Clean Eating

Easy Healthy Snacks

8:00:00 AM


One of the hardest things about changing to a non-processed diet, was trying to kill my sweet tooth. Not grabbing a piece of chocolate for dessert was tough at first, but reaching for a clementine became a quick and easy solution to that. Another tough thing that I've always done is snack. I couldn't just snack on anything and logged onto the internet to find clean eating snack ideas. Here I stumbled upon a few, mixed them up, tweaked them a bit and now I think they're ready for you! 
If you're looking for a new snack fix while at work or out and about, I've got a few ideas for you!

1. Granola
  I love Trail Mix, last semester I went through 3 bags in 2 weeks. It was insane and made me feel really bad. Now that I'm clean eating, I can just make a batch at home when I'm there for the weekend. It's just oats, cinnamon, your choice of nuts (peanuts, almonds, pecans, walnuts). and either raisins or craisins if you'd like! 
( always use sallys baking blog. for ideas and how to's.) Just search granola and you'll come across plenty of quick recipes!
Trail Mix
(this was sallys Peanut Butter Granola, I used butterscotch chips instead). 

2. Power Balls
  These are a quick and easy on the go snack. You don't really need a recipe, just some oats, your favorite nut butter, some chia seeds (or hemp seeds), and dried fruit if you'd like! Depending on how much you would like to make, change up the amount of oats (i usually go for 1 cup, and 2/8 of a cup of chia seeds and 1/2 cup of cashew or almond butter). There isn't any baking involved, simply roll these into balls and store in your fridge for a simple pick me up! 

Easy Vegan

3. Freezer Bars
      While my body was adjusting to life without refined sugar, I spent some time on the internet (shocking I know) looking for granola bars. While many of them had protein powder, I did find some that were easy and quick to make. As long as you have a freezer, you should be good to go! I found this recipe on this blog. With just 2 cups oats, 1/2 cup nut butter, 1/4 cup coconut oil, 1/4 cup maple syrup, honey or agave and 1/4 cup chia seeds, these bars are full of natural sweetness and my mom loves them! I had to make them for her before I left for university again!
Freezer Bars


If you're struggling to find easy recipes that go with your new lifestyle, I hope you use some of these! Both the powerballs and the bars are vegan recipes as well as clean eating, you can always change the recipes to fit your needs for your diet as well. 

Have you discovered any new treats or entrees? I would love to hear about them in the comments! 
Thanks for reading, as always! 
xx Kenzie


Banana-Blueberry

Healthy Banana Blueberry Muffins!

10:30:00 AM


Being home for the Summer means two things, more time to do everything, and more time to bake! I love baking, for some reason, I just love making things rather than buying them at a store. Though before this summer vacation started, I was warned not to bake as much as I did last time I was home...I may have baked four different types of desserts because I was only home for a day. Oops? 
Anyway, I enjoy trying new dishes and since I usually whip up something that falls into the dessert category, I wanted to try out some mini banana-blueberry muffins. 


Here's what you'll need!


2.5 cups Whole Wheat Flour
1 teaspoon baking soda
1/4 teaspoon salt
1/2 teaspoon ground cinnamon
1/4 cup honey
1/2 cup brown sugar
1 cup mashed banana (this took me two bananas)
1/4 cup vanilla yogurt
1/4 cup vegetable oil
3/4 cup milk (you can also use almond milk, soy milk, etc)
1 & 1/4 cup blueberries
2 large bowls, or one large, one medium

Here's how to make them:

*Preheat oven to 350 degrees Fahrenheit (176 degrees Celsius)
*Set aside muffin tins, I used one small sized and one for larger muffins, you can either spray these with a non-stick spray or line them with baking cups (which is what I did).
*In one of the bowls, toss the flour, baking soda, salt and cinnamon together until combined and set aside
*In the other bowl, mix the honey and brown sugar together; use a fork to break up the clumps
*Add the banana, yogurt and vegetable oil; add the wet ingredients to the dry, not the milk yet! 

*Gently fold together, and then add milk, mix for a bit and then add in blueberries. Careful not to over mix the batter. 
*Spoon out the batter into the muffin tins. Fill to the top of each slot.

*Bake for 17-18 minutes, to make sure they're well baked check with a toothpick. If the toothpick comes out with a little muffin bit clingy to it, it still needs a bit more time. About 2 minutes, and then check again. 
Once they're finished, let them cool. They will absolutely smell delicious, but you don't want to burn your mouth so you do have to wait. It'll be worth it I promise! :)

I was excited to try out this recipe because of the whole wheat flour, as I like to keep things on the more healthy side! It turned out very well and I actually think I prefer the whole wheat flour! I like the mini ones a little better than the bigger because they are great for a quick snack as well! 
I hope you guys give it a try! If you do, take a photo and show me on instagram or twitter! 
(here are links to both of my accounts! : Twitter, Instagram )

I hope that you are all having a great Summer so far! If it isn't Summer for you yet, I hope it comes quickly! Mine so far is turning out lovely! 
Thanks for reading!
xx
Kenzie


Eating

Eating Nature

11:30:00 AM


After months of seeing it advertised on YouTube, and once on a blog itself, I decided that it was time to finally give it a try myself. Being at Uni, snacking in between classes can be very right (those carrot sticks) or very wrong (what's one more chocolate chip cookie?). After debating a bit whether or not to wait until Summer, I decided that it would be fun, as it always is, to get something in the mail! And with a busy week it would be an exciting thing to look forward to as well!


Thankfully, if you order your first trial box of snacks, it only costs $2! Packed in my box were the Big Island Pineapple, Sweet Blueberry Almonds, Honey Dijon Pretzels, Strawberry Yogurt Pretzels and Sea Salt Pop Pops!


The excitement of hurrying from the mail pick up to my dorm room was overwhelming! And opening the box was just as exciting! The very first snack I tried were the Sweet Blueberry Almonds. These were incredible, and set my hopes high for the rest of the snacks inside as well. They weren't too sweet but just right. Covered in a blueberry-like powder. I had to stop myself from eating the whole bag in one sitting!


The second snack I decided to try were the Strawberry Greek Yogurt Pretzels. I had had yogurt covered pretzels in the past, and these did not disappoint. The sweetness of strawberry blended well with the saltiness of the pretzel!


Thirdly, I tried out the Big Island Pineapple. Knowing this was one YouTubers favorite (Shay Carl from the Shaytards). In my honest opinion I didn't think it was my favorite. I usually like dried fruit. It was still good though and even though the package says you could have more than one per serving, I just stuck to one. 


My fourth snack that I tried out was one that I was really excited about! The Honey Dijon Mustard Pretzels. These were one of my favorites, and my taste buds were extremely happy with what they experienced! 


The last bag out of the five that I had gotten in my box, were the Sea Salt Pop Pops. These are little popcorn kernels and seemed perfect for a late night study session snack! They also have no sugar so there isn't any worrying about being up all night!


All of these snacks would be perfect to set out on the counter or table if you're expecting guests! If you're looking to try something new this summer I would definitely recommend Nature Box! 
Have you tried ordering food through the mail before? What did you get? 
I was torn between this or Macarons, but Macarons are slightly more expensive! 

This isn't a sponsored post, it is all my opinion! 
Thanks for reading! 
xx


Baking

Healthy(ish) Deviled Eggs

2:00:00 PM


  After coming home on Spring Break and jumping right into work, I had a day off. Of course, since I can't seem to sit still and stare at the same thing for hours upon hours, I decided to bake. I also haven't baked anything since leaving for my university and therefore I was really excited to start trying new recipes. 

 Deviled Eggs are usually something that is brought to parties, they're quite simple to make and even more fun to eat! I always love going to a get together and having these set up on the snack table. I have never made a deviled egg before and I was excited to try it out! I mean how difficult could it be? I'm also trying to eat healthier and if I can find a way to make it healthy 


The deviled eggs I made required:

6 Eggs
Greek Yogurt
Dijon Mustard
Pepper
Salt
Paprika


Steps:
  1. The first step is to hard boil your eggs. I have an  egg boiler, though mine looks a bit different, if you're wondering what one looks like I've posted the link to one here!
  2. After waiting for the eggs to boil, let them cool. I didn't have the patience and therefore a few of the egg whites broke! Oops. 
  3.  After cooling, cut the egg lengthwise. 
  4.  Your next step is to then carefully spoon out the yolks and add them to the medium bowl, place the egg whites on a plate. 

Now add in these few ingredients to the bowl you've put the yolks into:
      1/4 cup Greek Yogurt
      2 teaspoons dijon mustard
      1/4 teaspoon pepper
     1/8 teaspoon salt
     
Mash these together, until it looks a little creamy. You can also use a blender if you'd like the mixture to be more creamier than it appears. 


 After mixing and mashing, you can either spoon small portions into the egg whites, or just use your hands and fill them as much or as little as you would like! 
After filling the eggs, sprinkle a bit of paprika on top! This will make them look nice and pretty! 
  I was very pleased with how these turned out! They taste delicious and actually make for a good snack! They're easy to make and I hope you give them a go! 


I know I haven't written a recipe post in awhile, but I hope you all enjoyed this! Thanks for reading! Have you tried any new recipes recently?? Are there any new recipes that you want to try, or wish you could try? 
             I love reading your comments! See you next time! 
                               xx
                                Kenzie

dinner

Reliving NYC

4:28:00 PM

This past summer I was lucky enough to go on a trip for my graduation present. I could choose any place in the states, and I chose to visit New York City. I hadn't been there for 5 years and I loved it! So I thought why not go back! And as of now I'm looking for another opportunity to go back but that might be another 5 years ha.


While I was in New York, I made some pretty nice friends! One of them recommended a restaurant one night and I  had no idea how obsessed I would become with an appetizer. 
 At Hurley's in NYC, right off of Times Square (you can check out their menu and address here: ( hurleysnyc.com), they have these delectable Irish Cheese Fries! I'm not normally someone who chooses fries with a meal but there was bacon and cheese on top, and I like trying new foods anyway so I gave them a chance!  They also give you the choice to dip the fries in gravy! What?! I know sounds weird right? But trust me you'd be very surprised at how fantastic they taste! The place is set up to look somewhat in a different era almost, it had a really classy feel and it wasn't too pricey either!
 We don't have anything like them in Wisconsin so as soon as I got home I started missing them terribly! 
  So, recently I thought..how difficult could it be to remake them? Not very. 
  I looked on Hurley's menu online and saw the ingredients, cheddar jack cheese,bacon,scallions and of course fries! I didn't use any scallions on the fries I made but if you do I'm sure it'll taste great! They didn't have a recipe but I also compared a few of the recipes from allrecipes.com
I also used turkey gravy because I wasn't too sure which one would taste the best with them, so I encourage you to experiment a bit! 
The next step was baking the french fries, preheat the oven to 450 degrees Fahrenheit, and put the fries on a pan and bake for about 20 minutes. Then, spread the cheese( I used Mild Cheddar) over the fries, you can use as much as you want and then top it with the bacon bits, again using as much as you want! Put the pan back into the oven under broil. 
   While that's going, warm up the gravy in a bowl in the microwave. I put it in for about 2 minutes. 
 Then pull the fries out of the oven and the gravy from the microwave. Sit down and Enjoy! 

                                      
 You might also enjoy these with any other dressing, such as ranch too! 
They were excellent, and I'm so glad I tried the recipe! 
I can't wait to make some more! :) 
xx


Food

Mini Fruit Pizzas!

5:35:00 PM


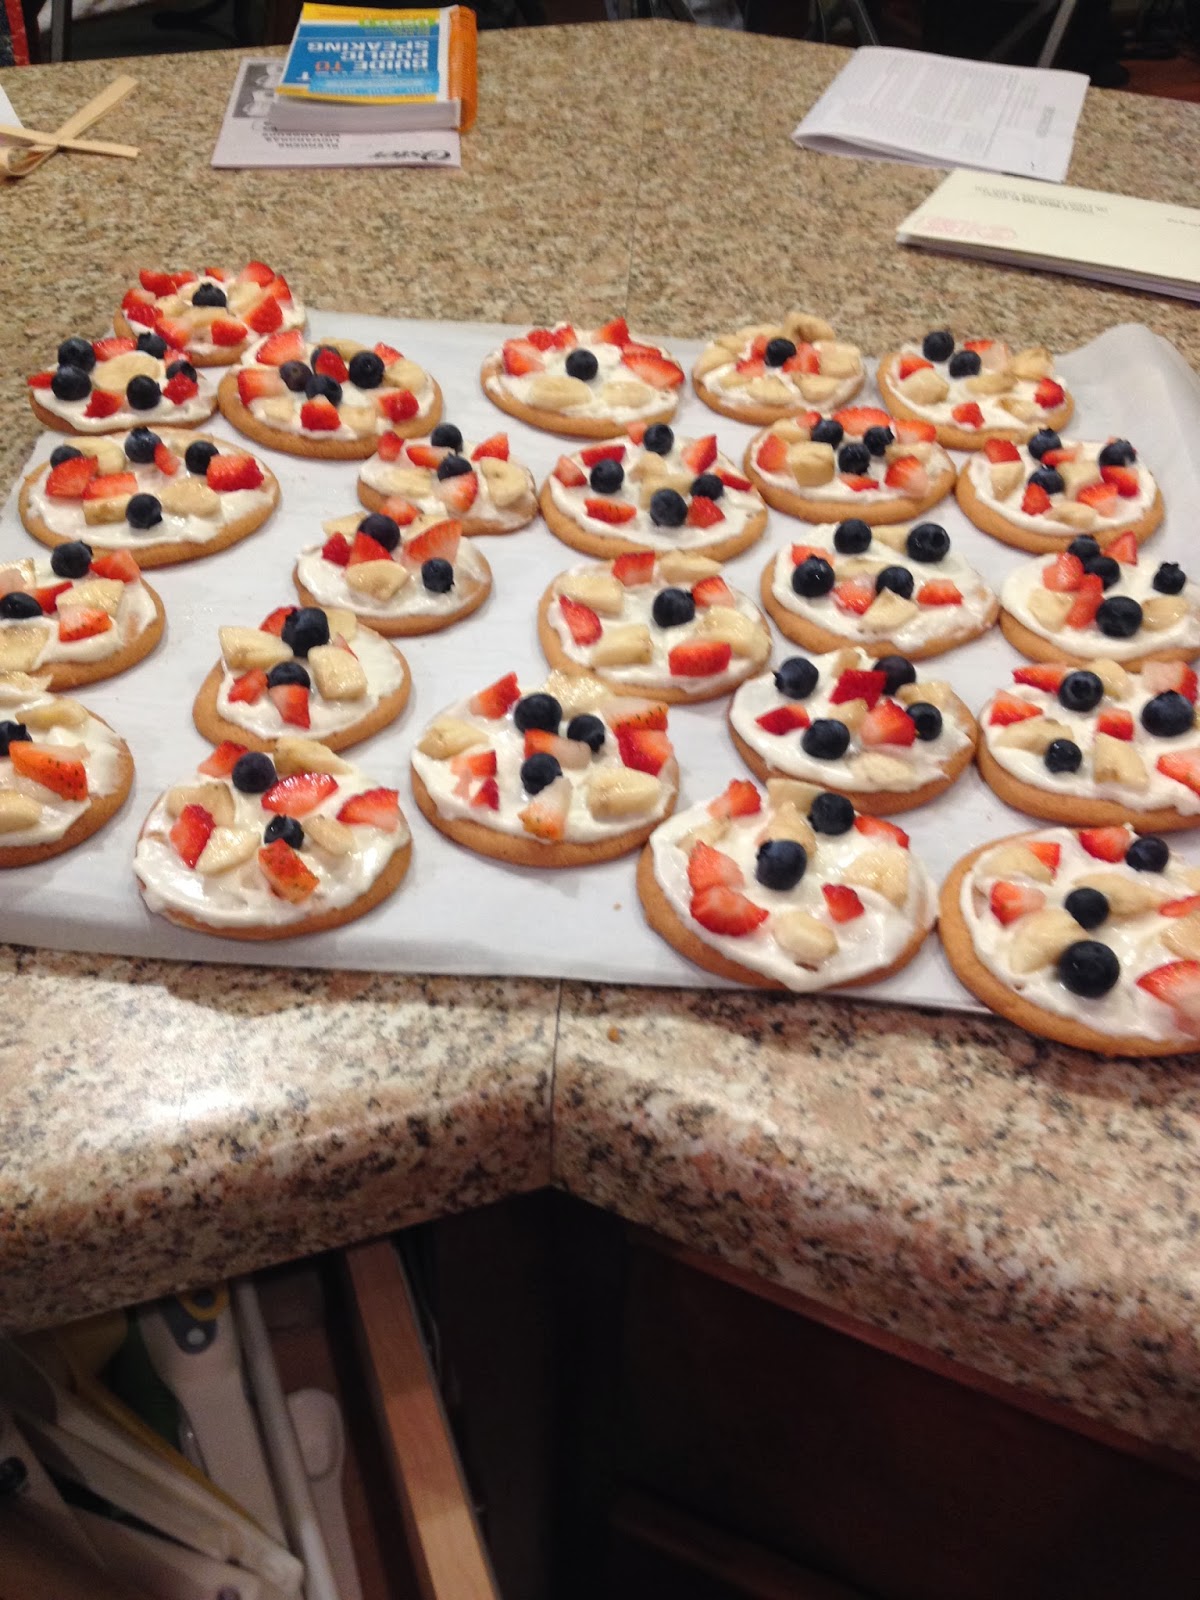
In 2012 I went on a cruise, which is where my obsessiveness about Europe comes from, but on this cruise they had amazing little fruit tartlets and recently I had decided I needed to bring these back into my life!


So with some brainstorming from my mom, the easiest way to make this was to make a mini fruit pizza. They taste amazing and I thought I would share them!

First, I used a tube of sugar cookie dough so I could cut them into pieces that wouldn't go as big. One tube made the perfect amount. Place the slices on a tray,(I used parchment paper on top so I wouldn't have to clean it off). Bake the cookies for about 10-12 minutes at 350 degrees (or whatever it says on the back of the container) , I would suggest to keep checking the oven as I had sliced a few thin ones and didn't want them to get burnt so just look for the golden-brown color. The second thing, is to chop up a few slices of fruit. You can use any kind of fruit you like for mine I decided to use bananas, strawberries and blueberries. I used a full banana and it was perfect for the amount of cookies that were made( I think a little bit less than 20 maybe 18/19?)
 Then I put that aside. 
 
The frosting bit is made of crème cheese and yogurt, we used two cups of vanilla yogurt.We also used an 8oz block of crème cheese. Again, like the fruit,  you can switch up the flavor of yogurt depending on your own taste!. This made more than enough so maybe use a little less crème cheese!Wait for the cookies to cool off a bit before putting on the frosting!!

 
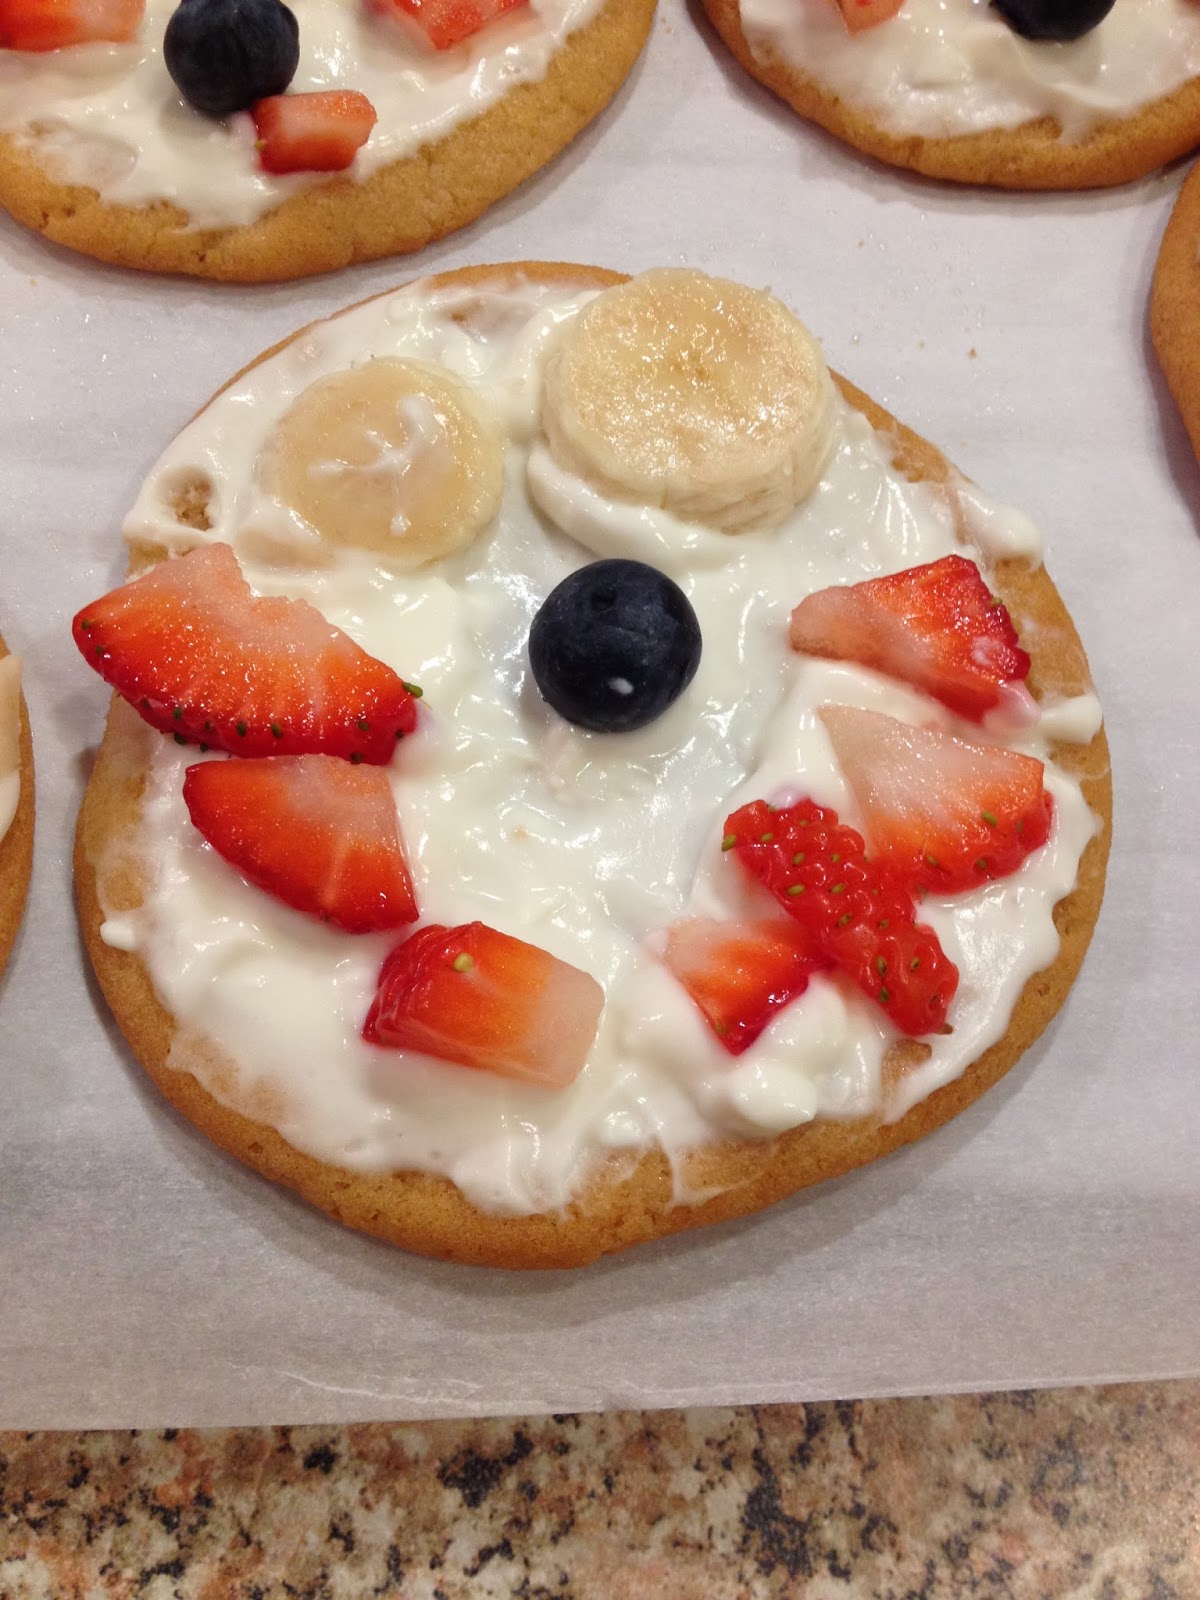
 You can add however much fruit you want and decorate to your own liking! I even did one with a smiley face ;)


It's really easy to make and doesn't take that much time at all! It's great as a little appetizer or a somewhat healthy snack! The best part is, you can change it up and make it your own! Go ahead and try it!
  Have fun! :)

Instagram